Only released in EOL distros:
Package Summary
A PR2 application that uses Interactive Markers to provide a point-and-click inteface for controlling the PR2 in Rviz.
- Author: Adam Leeper
- License: BSD
- Source: svn https://code.ros.org/svn/wg-ros-pkg/stacks/pr2_object_manipulation/branches/0.5-branch
Package Summary
A PR2 application that uses Interactive Markers to provide a point-and-click inteface for controlling the PR2 in Rviz.
- Author: Adam Leeper
- License: BSD
- Source: svn https://code.ros.org/svn/wg-ros-pkg/stacks/pr2_object_manipulation/branches/0.6-branch
Package Summary
A PR2 application that uses Interactive Markers to provide a point-and-click inteface for controlling the PR2 in Rviz.
- Author: Adam Leeper
- License: BSD
- Source: git https://github.com/ros-interactive-manipulation/pr2_object_manipulation.git (branch: groovy-devel)
Contents
Overview
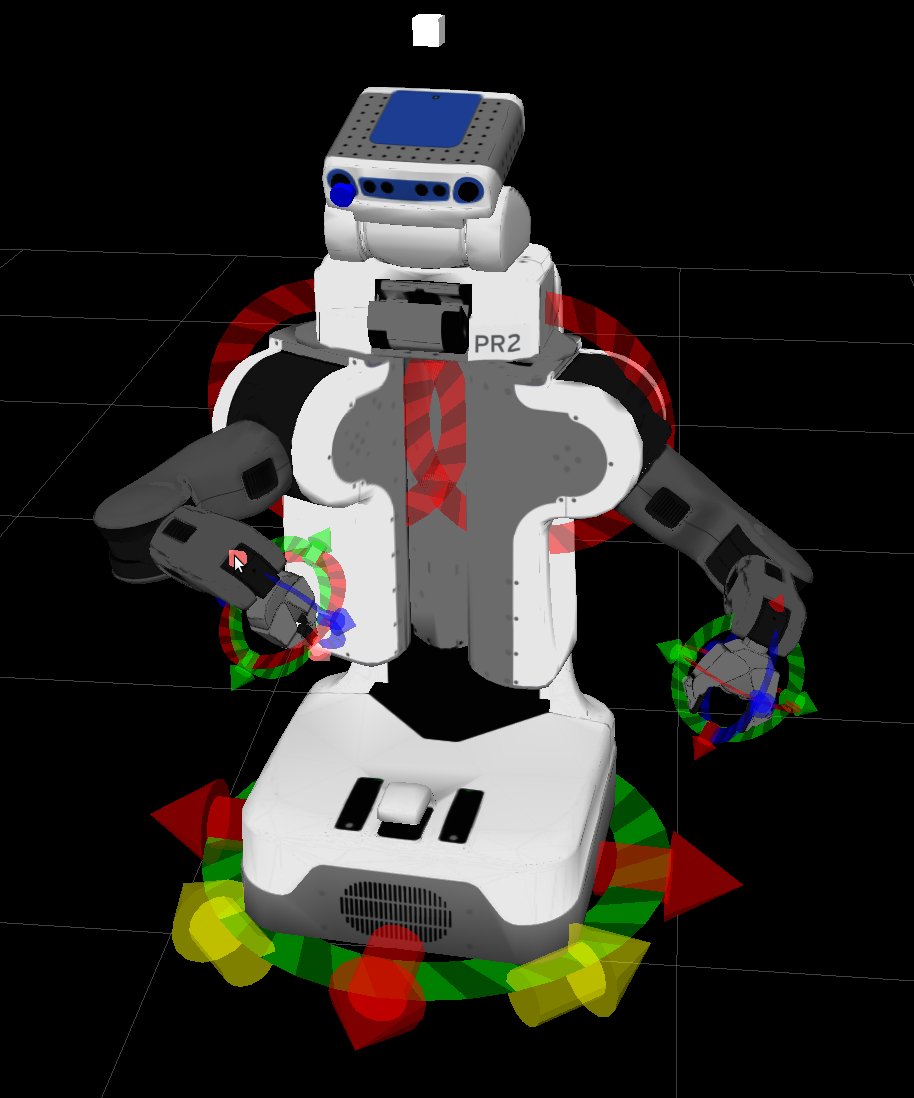
This package provides an end-user graphical interface for controlling the PR2. Specifically, it uses interactive_markers, in combination with Rviz, to allow a user to command the various parts of the robot.
Installation
See this page for information on getting the needed packages installed for using interactive markers.
Launching
To bring the robot up in simulation:
roslaunch gazebo_worlds empty_world.launch

roslaunch pr2_gazebo pr2.launch

export ROBOT=sim

roslaunch pr2_interactive_manipulation pr2_interactive_manipulation_robot.launch sim:=true

roslaunch pr2_interactive_manipulation_frontend pr2_interactive_manipulation_desktop.launch sim:=true
In Rviz, add a "Interactive Markers" topic, and subscribe to /pr2_markercontrol/update. Finally, select the "Interact" button in Rviz tool bar (upper-left).
Controls
Every interactive piece will glow when you hover over it with the mouse. Remember interactive markers are only shown when the "Interact" mode is selected on the Rviz toolbar (the default is usually "Move Camera").
Head
Head Pointing
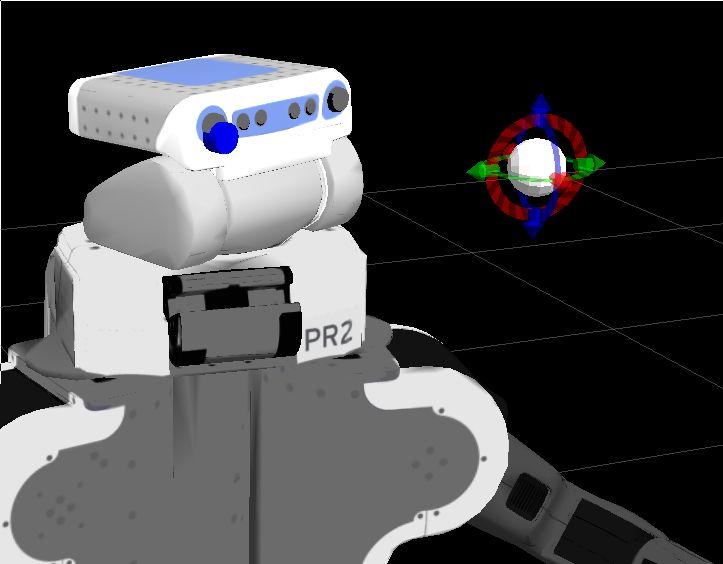
This control allows you to drag around a target for the PR2 head to point toward.
- Enable or disable display of the target by right-clicking on the head of the PR2 and selecting "Target Point."
- The target point can be moved precisely by dragging the arrows on the colored control handles. Te colored discs allow you to change the orientation of the arrows.
- The white ball in the center is a "view-facing" marker and is always dragged in t he plane of the current Rviz camera view.
Texture Projector
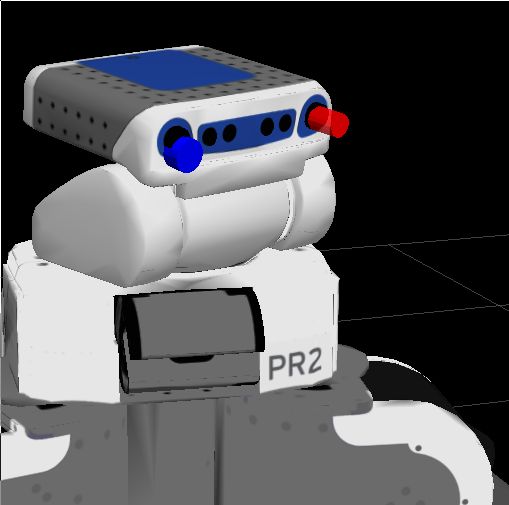
This control serves as an indicator of the status of the red texture projector and allows you to turn it on and off.
- To turn on the projector, right-click on the head of the PR2 and toggle the "Projector" menu entry. After up to 5 seconds, a red cylinder will appear in front of the PR2 head.
- To turn the projector off use the same menu option from the PR2 head, or simply click the red cylinder.
Please Note: turning the projector on and off can take up to 5 seconds. Please avoid clicking on the projector control multiple times during this period.
Arm Control
Gripper Movement
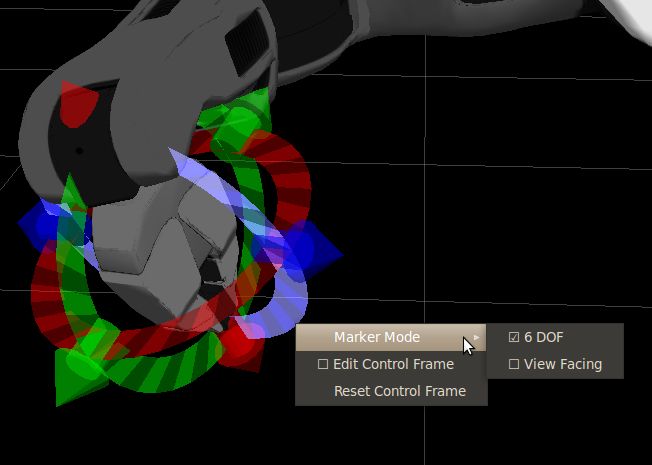
This control allows you to move the grippers!
Gripper Palm:
- Left-click on either gripper palm to enable/disable the control rings.
- Right-click on a gripper palm to get a menu to open or close that gripper.
Control Markers:
- Left-click and drag the rings and arrows to translate and re-orient the gripper.
- Right-click on any of the control rings/arrows to bring up the following menu options:
- Marker Mode: When this is enabled you can arbitrarily move the control markers themselves, which changes the reference frame for the gripper controller.
- Edit Control Frame: When this is enabled you can arbitrarily move the control markers themselves, which changes the reference frame for the gripper controller.
- Reset Control Frame: Re-centers the control markers to the current gripper location.
Posture Control
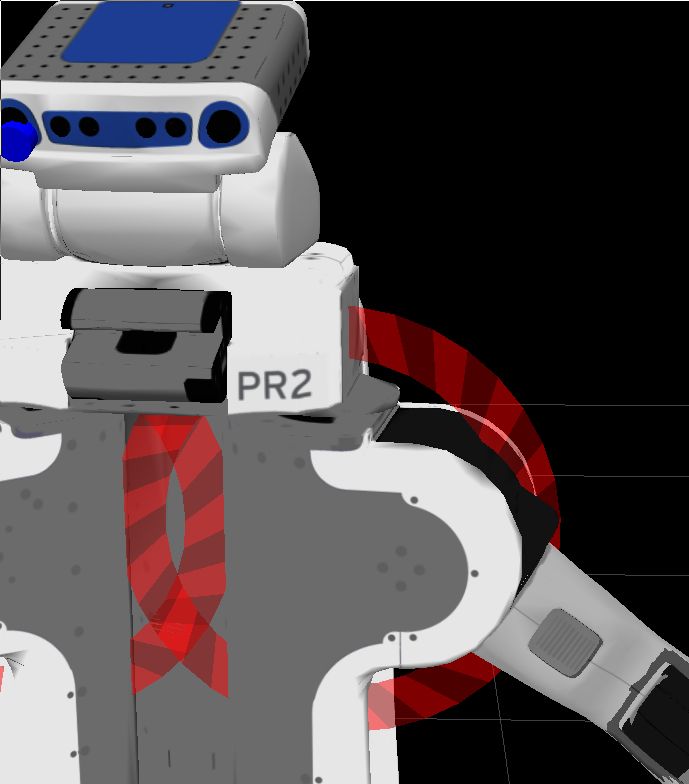
- Right-click on the upper arm to get a menu to enable or disable posture control.
- Left-click and drag on the red rings to change the approximate orientation of the elbows.
Torso Control
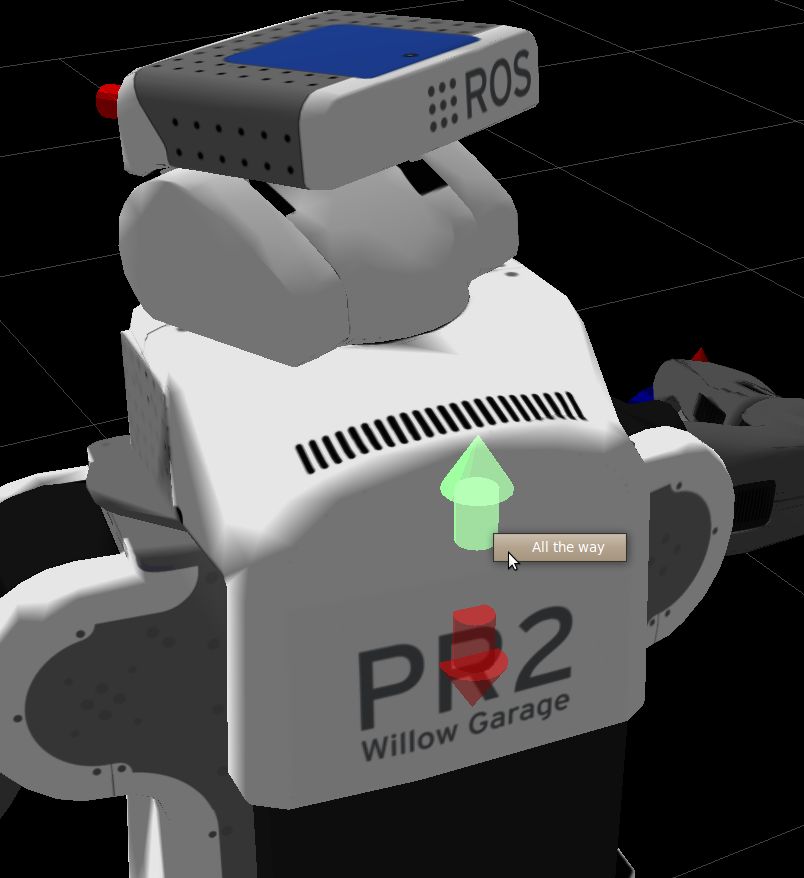
This control allows you to raise and lower the spine of the PR2, using a pair of red and green arrows located on the back of the PR2.
- To raise or lower the spine, simply click and hold the up or down arrow. The spine will stop when you release the mouse.
- To raise or lower the spine all the way without having to hold the mouse button, right-click on either of the controls and select "All the Way" from the menu.
Base Control
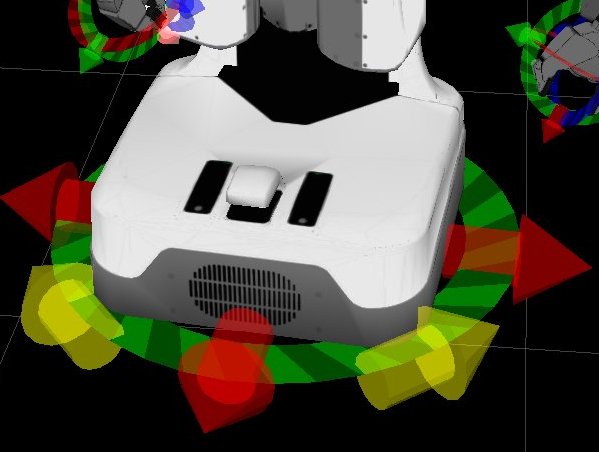
* Please use with extreme caution!! * There is NO collision avoidance provided with these controls.
This control allows you to move the base of the PR2.
The arrows are currently placeholders and are not yet connected to the actual base controller...

Development Status
Completed Items:
- Head pointing
- Projector on/off
- Gripper 6-DOF pose control using JTranspose controller
- Arm redundancy ("posture") control
- Gripper open/close
- Torso up/down
In development:
- Base movement
- Switching between JTranspose controller and Joint controller.
Possible support, depending on interest:
- Laser tilt commands (slow/fast/stop)
- Variable closure commands for gripper
Comments/feedback welcome!
