New in Diamondback
Only released in EOL distros:
Package Summary
A package for user-aided grasp planning, where the user provides some sort of information based on sensor data from the robot. Examples include the user clicking somewhere in an image to tell the robot where to grasp from.
- Author: Matei Ciocarlie
- License: BSD
- Repository: wg-ros-pkg
- Source: svn https://code.ros.org/svn/wg-ros-pkg/stacks/pr2_object_manipulation/tags/pr2_object_manipulation-0.4.4
Package Summary
A package for user-aided grasp planning, where the user provides some sort of information based on sensor data from the robot. Examples include the user clicking somewhere in an image to tell the robot where to grasp from.
- Author: Matei Ciocarlie
- License: BSD
- Source: svn https://code.ros.org/svn/wg-ros-pkg/stacks/pr2_object_manipulation/branches/0.4-branch
Contents
Launching the Gripper Click tools
The Gripper Click tools are implemented as rviz displays. Usually, they are started and used as part of the pr2_interactive_manipulation package. See that package documentation for details on how to start the entire interactive manipulation pipeline.
Using Gripper Click
The Gripper Click rviz displays will normally not display anything unless called. Once called by the interactive manipulation pipeline, they will pop up a window requesting user input.
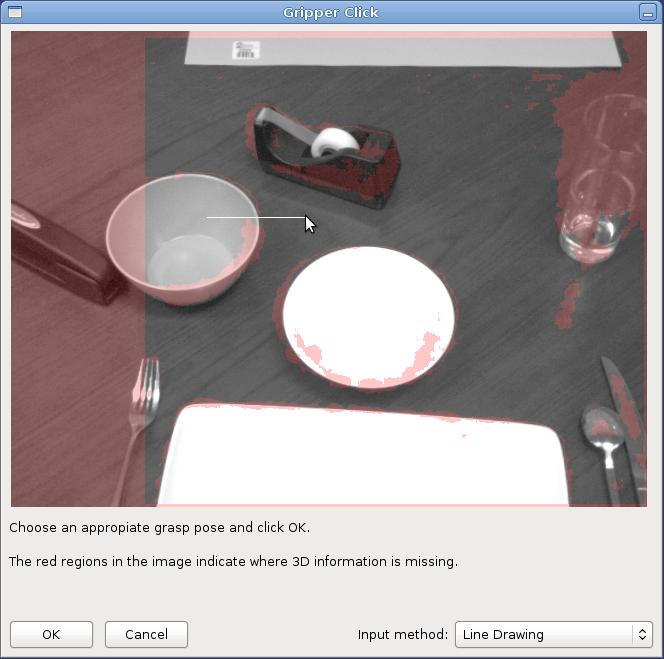
In general, the pop-up window will show an image from the narrow angle robot camera. Masked in light red will be the image points for which we have no associated depth information, those are generally not usable for grasp and place selection.
Even though the pop up tools display a monocular image, we also use the associated depth information for two purposes: to choose 3D points for grasping and placing, and to render the correct occlusions when superimposing meshes on top of the image. This generally helps a lot with position and orientation selection.
Grasping
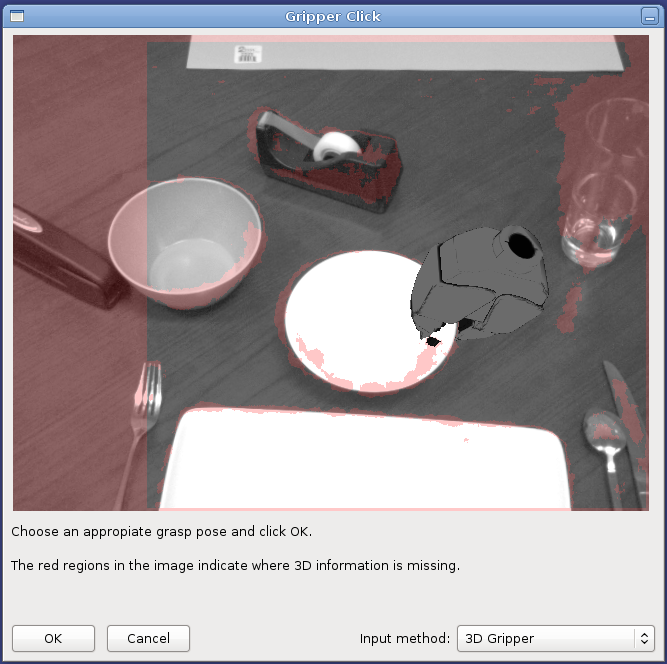
The grasp selection pop-up window will also offer two options for selecting grasps, 3D Gripper and Line selection. You can choose between them using the drop-down list in the bottom right corner of the window.
Line selection
This method assumes the gripper will approach the object coming from the viewpoint of the camera. You just need to select a location and a gripper roll angle:
- left click on a non-red point on the image to select the gripper location
- drag to choose the gripper orientation (roll angle)

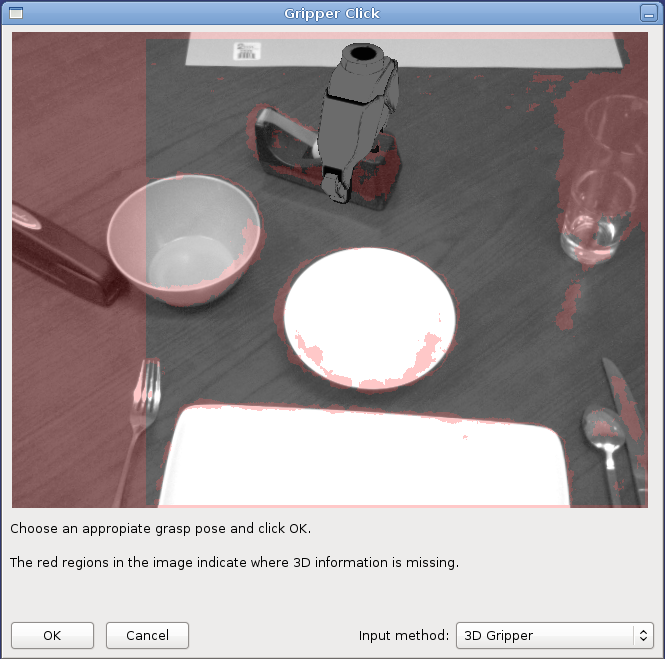
3D Gripper
This method allows you to completely specify the grasp point in 6D:
- double left-click on a non-red point to choose grasp location
click and drag the left button to select gripper pitch and yaw
turn the mouse wheel to select gripper roll
- click and drag the right button up and down to translate the gripper along the current approach direction
click and drag the mouse wheel to modify gripper opening. Note: this component is currently disregarded when the grasp is actually executed, and the gripper always approaches the grasp fully open. We will fix this soon.


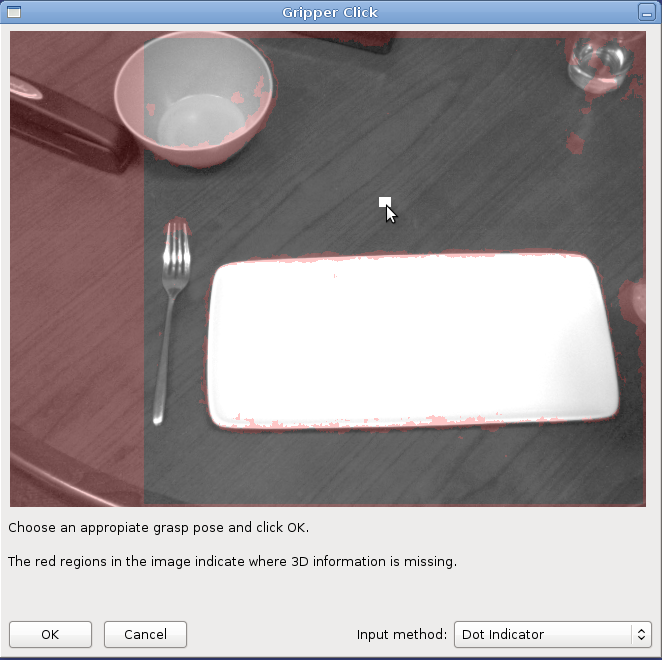
Placing
This method allows you to select where an object should be placed:
- left click on a non-red point to choose place location

Where exactly the gripper goes based on your chosen place location depends on the grasp that you have executed. In most cases, the manipulation pipeline will attempt to choose a gripper orientation that maintains the same orientation of the object relative to the world that it had when you grasped it. If that information is not available, a pre-specified gripper orientation will be used.
